
With plaster the results are very quick and you don't have to bake them for 2 hours.
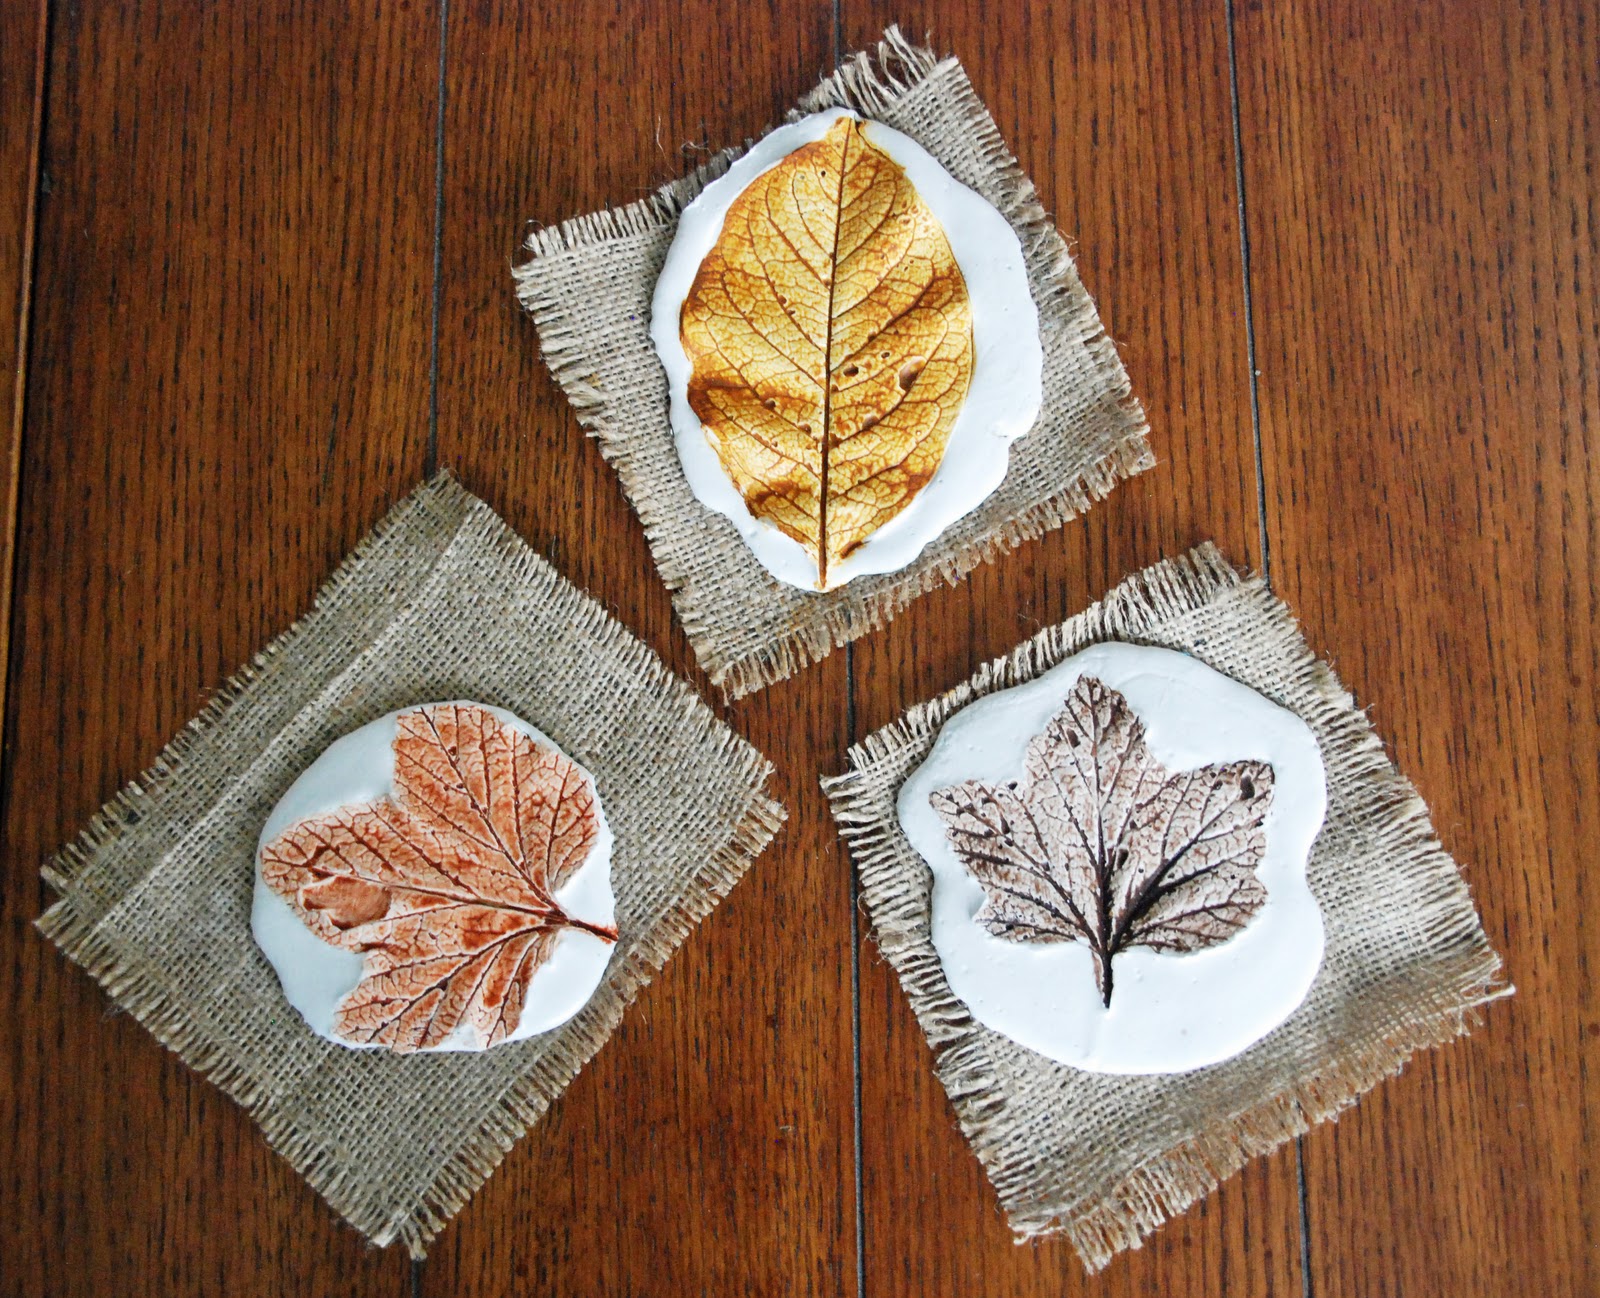
ooooh such Fall loveliness!
Don't let plaster work intimidate you it's really pretty easy once you get the hang of it.
MATERIALS REQUIRED:
- small squares of Burlap
- Plaster of Paris, (I buy mine at the Hardware store by the carton or the bag)
- old yogurt container for mixing, or 2 , or 3,
- stick or old spoon, I use a chopstick
- newspaper
- water
- a really nice leaf, not dried out but still pliable
- some acrylic paint in Fall colors
- Mod Podge, acrylic medium, or white school glue
PROCEDURE:

Cover you work space with an old vinyl tablecloth, art board, or newspaper.

If your leaf is thin and tears easily it might be a good idea to apply a thin coat of Vaseline on the back of the leaf. This will ensure it releases from the plaster.

If you are pouring for a class or making alot of these have several containers so you can continue to mix and pour while the excess plaster is setting up in the previous container.

Have your leaves at the ready.
At school I did this with small groups calling up 4 kids at a time. The rest of the class worked on painting Frescoes.
If you have never used plaster before do a little test batch to get your feet wet.
 Mix up a small amount of plaster. I use a disposable drink cup to pour the dry plaster into the container and then add your water. It's 2 parts plaster to 1 part water but to be honest I don't measure any more. You'll learn to get the feel of it as you go.
 Mix frantically to get it nice and smooth. It will be like thick buttermilk in consistency....keep mixing when it becomes like yogurt start pouring.

Pour out onto the burlap. Pour out the 4 or so you are doing and then go right back and shimmy the burlap a bit to flatten it and release the air bubbles.

Using your fingertips lightly press those edges down and make sure the whole back surface is touching the plaster.

See here is a leaf cast where a portion of the leaf wasn't touching leaving that gap.

Let the plaster set up for about 10 - 15 minutes and then peel back the leaf to reveal the print.

If some leaf bits remain just go back and take them out.

Here are the Grade 6 prints in process.
Let your plaster set up fully. Let it dry for a day or so.

Fray the edges of your burlap a bit for a nice look.

Plaster absorbs paint like crazy, in order to get that nice wash effect you need to put in that sealer first.
Let dry.

Put a little bit of acrylic paint on your palette. Add some water to thin it out and then paint in where the leaf left it's imprint.
If you make a mistake just rub away the paint with a moist paper towel and try again.....that's the great thing about having that sealer coat.


 That's it. A great Fall accent for your home .
Give it a try and I'll see you next time!

These are lovely! I always enjoy seeing the things you come up with, you're an awesome artist!
ReplyDeleteharika bir çalışma olmuş.ben bayıldım buna.
ReplyDeletethats great!!! amazing tutu as always *(*
ReplyDeleteHey Gail ... I tried something similar to this a couple of weeks ago using air-drying clay....the children pressed the leaves into the clay then they cut around them with a scissors and sculpted the clay leaves into interesting shapes and left them to dry, they looked great.
ReplyDeleteLove this idea!
Deletethis looks like a lot of work but very pretty results! Wow, I love this. Got here via Teri's blog.
ReplyDeletewww.myreallifereviews.com
My comment went poof! got here via Teri's Painted Daisies. These are so beautiful. sound like a lot of work though, would take patience.
ReplyDeleteGreat work!
www.myreallifereviews.com
Hi Gail! Believe it or not, I was looking up information about spackling and mixed media painting, and somehow something brought me here! Love your blog; and be it a project for kids or adults, I love ALL the posts I'm seeing here! Very inspiring, and looks like FUN! I look forward to visiting again! TFS! ~tina
ReplyDeleteI love these! Thanks for sharing your great projects. I use them often in our homeschooling!
ReplyDeletewhat a fantastic idea! They turned out so pretty!
ReplyDeleteFantastic idea Gail!
ReplyDeleteHello from Karpathos island - Greece!
I found your blog and it was a very pleasant surprise. Its fantastic and I liked it very much.I will follow you! Regards from Greece!!
ReplyDeleteWow, I love this so much. :) Great idea!
ReplyDeleteGreetings from Sweden
Thank you Gail, very beautiful idea!!! kisses from Greece.
ReplyDeleteAbsolutely beautiful... I love the way you present your posts... very professional..Anna:)
ReplyDeleteGorgeous!
ReplyDeleteVery pretty, I think my son would love doing this activity. Can you use regular cloth instead of burlap you think? I have no idea where to get burlap.
ReplyDeleteGreetings from Holland, Claudia
Yea I tried it with a plastic type of cloth and it was great
DeleteHey Claudia,
ReplyDeleteYou can use canvas or any fabric that has a loose weave for the plaster to adhere to. Good luck with the project.
Thanks everyone for your truly awesome comments. I am so happy I can post comments on my own blog again1 (was stuck in a loop that wouldn't let me)
Love this! I have featured this on Fun Family Crafts :) http://funfamilycrafts.com/plaster-leaf-prints/
ReplyDeleteAmazing! Very good explanation! Thank You for your fantastic ideas!
ReplyDeleteDoes the plaster come off the burlap? I think it would be gorgeous to hang them on the wall but would worry that they would fall off and break.
ReplyDeleteHey Jackie, When the plaster has dried turn the print over, paint another coat of mod podge or tacky glue over the burlap where the leaf plaster is attached, let dry. I have done this simple step when hanging frescoe and these leaf prints and have not lost one yet!
ReplyDeleteThank you Gail!!
ReplyDeleteLovely idea. I home school my little chap and this is just the kind of thing to keep him happy! Thank you!
ReplyDeleteYou have great style and are so creative! I love stopping by to see what you have come up with.I will try soon.
ReplyDeleteThese look wonderful! I tried a practice one and when I pulled up the leaf, part of the plaster came up with the leaf (mostly towards the middle of the leaf). I left it for 15 minutes before I pulled up the leaf. Any ideas why this happened? Did I leave it too long, press too hard/not hard enough? Thanks for the ideas!
ReplyDeleteYou could try a bit of vaseline on the leaf to stop the plaster from sticking, the only other thing I can think of is that there is a deep indentation near the centre of the leaf and the plaster is catching in that, the vaseline should help. Good luck with your future leaf prints
DeleteDo you think using quick set drywall would give the same effect? I can't use plaster of paris because it would take to long to set for what I need. Also, I the quick set drywall would work, do you think I would have to wait the same amount of time for the leaf to be imprinted? Thanks.
ReplyDeleteHi Montana,
DeleteI haven't used quick set drywall before. Plaster of Paris sets up in 20 minutes which is pretty fast, by the time you pour, place the leaf in and then remove, regular drywall takes about 6 hrs. How fast is quick set drywall?