
The earliest evidence of the "wet plaster" fresco technique dates back to 2000 - 1550 BC or the Middle Bronze age.
You can easily reproduce this technique in the classroom.
Here is a picture of a fresco ("Landscape with Swallows"), on a wall from ancient Greece, specifically Thera. It is now in the National Museum in Athens and is dated from the Middle Bronze age.Click on picture to see larger.
 and is dated from the Middle Bronze age.Click on picture to see larger.
MATERIALS REQUIRED:
- plaster of paris
- a recycled container or one you don't care about
- old spoon or stick for stirring
- burlap, canvas, or natural fabric with a large weave that is cut into rectangles
- wax paper or newspaper
- pastels (chalk or oil), tempera, and/or acrylic paint, pencil crayons also work well
- sealer (I like Duraclear)
- white glue

Cut out your fabric (I'm using burlap as that is what I have on hand) into the size you want for the project. I tend to make rectangles about 5X7. Pour your plaster into your recycled container, here I'm just making a few so I'm using a plastic cup. When I'm doing this for a whole class I'll use a 1 litre ice cream container. I would rather make up 3-4 small batches of plaster then one large one as it sets up fairly fast and if you aren't quick enough in pouring you'll have a lot of wasted plaster. For a class of 25 you need about 3 cartons (they look like milk cartons), you can also buy plaster by the bag which is what I have at school. (it's cheaper in bulk). You can find it at any hardware store.

Lay out your burlap rectangles onto wax paper or newspaper. I use an art board as my base so I can move them around.
Mix up your plaster the ratio is 2 parts plaster to 1 part water.When thoroughly mixed pour out some on the fabric. Continue until you run out of plaster from your first mixing. Quickly go back and shake the corners of the fabric to help it spread out evenly and bring up any air bubbles. The plaster thickens up quickly, like in 10 minutes, so your last few you may need to spread the plaster out with a piece of cardboard or an old gift card using them like a spatula. Let the plaster left in your container harden (will only take a few minutes) and then tap it on it's side on the ground. The leftover plaster will loosen from the sides, throw the rennmants out and then make up your next batch.
Let dry.
Now it takes about 24 hrs for the fabric to dry out, your plaster will still be cold to the touch, but you really don't have to worry too much. I have used ones that have sat drying for 2 months and they still work so just pick a time frame that works for you. You can always spray some water onto the surface to make it damp again especially if you are working with chalk pastels.

Depending on your theme for this lesson (Egyptian, Ancient Greek, Italian Renaissance) have your students check out some reference material to get design ideas. It is also a good idea to have them sketch out a practice drawing.  Now you can lightly pencil in your design onto your plaster. It will allow for some erasing with a good white eraser but you don't want them to push too hard with the pencil or they will etch lines into the plaster. That's a different lesson. (Scrimshaw, Egyptian Hieroglyphics, or Aztec Glyphs) I'll post those another time.
 Now you can lightly pencil in your design onto your plaster. It will allow for some erasing with a good white eraser but you don't want them to push too hard with the pencil or they will etch lines into the plaster. That's a different lesson. (Scrimshaw, Egyptian Hieroglyphics, or Aztec Glyphs) I'll post those another time.
Now you can add your paint, colored pencil or pastel. If you are using pastel you might want to have a dry brush to wipe away any excess color crumbs.
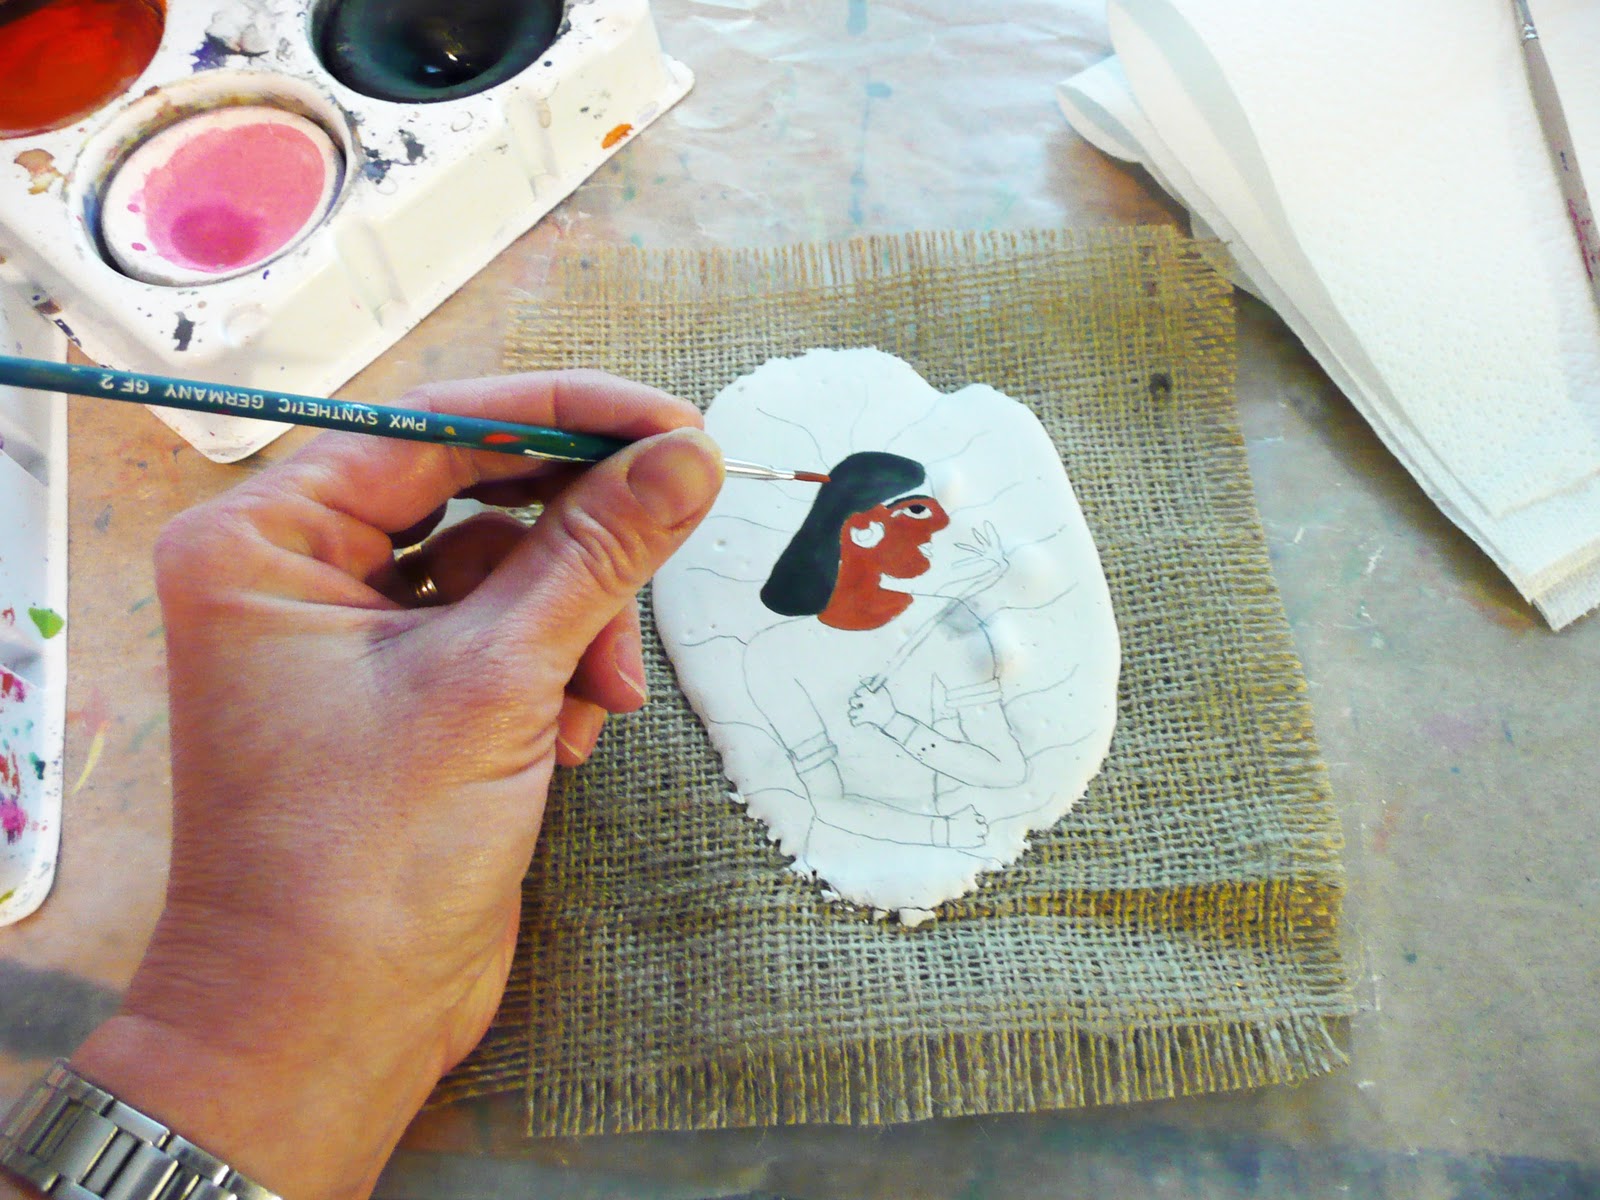
Plaster accepts paint very easily so I make sure the students realize there is no going back. Once you apply paint on the plaster it is there to stay in fact it dries almost immediately. So you need to plan your painting accordingly.

After you have added color you can distress the plaster if you wish. I have them break it apart a bit to get a few cracks, other then losing afew crumbs of plaster on the surface the piece will stay stuck to the burlap.

 You can antique your fresco at this time if you wish. Take some light brown paint and water it down well (that plaster will suck up that color). Apply over the surface.
I like to add a sealer at this time. The sealer makes it shiny and very professional looking. In fact it mimics glazed pottery so this is a good alternative for a decorative tile project when you are short of time. If you have used tempera paint you may get a little bit of bleeding but it kinda adds to the antique look. Let dry.

Finally I add a coat of white glue to the back to ensure the fresco stays stuck to the cloth. For display I have done a few different things. You can mount the fresco onto a foam core board or a piece of heavy cardboard. You can also hang a series of them down a strip of cloth just make sure to sew tack at the top and bottom of each fresco. To hang at home you can make a loop at the top out of heavy string or fabric.

That's it for now.....
Some housekeeping items:
- Please check out the Art Teacher Blog Directory on my sidebar. Marcia at Vivid Layers has set up this list and this link should take you to the most recent edition.
- Thank you LaBlog for featuring me this month. Lablog is published by Labbe Publications in Germany, if you get a chance check them out.
- I appreciate all the photos for the Art Gallery, please keep them coming and I'll try to keep it updated.

Thank you thank you thank you! For this awesome idea... I was trying to figure out what we are going to do to go along with our Greek unit this year. I typically do mosaics, but the grouting is so tedious, messy and annoying. I'm thinking we will place some mosaic tiles around the outside of this and then paint the inside design. Thanks! Marcia
ReplyDeleteHi Gail!
ReplyDeleteVery cool frescos, and thanks for the re-fresher art history lesson too! If it's okay I may hang around and follow along, you know, for inspiration and such. :)
Thanks,
Michele
very nice. this inspired me to try out some pomepian gardens frescoes:
ReplyDeletehttp://toata-lumea-picteaza.blogspot.com/2011/01/imitatie-de-fresca-gradina-pompeiana.html
*pompei (sorry)
ReplyDeleteHow quickly after pouring the plaster onto the burlap can paint be added to the fresco? I'm teaching an after school class and we only have an hour and a half once a week...
ReplyDeleteGreat fresco. Very nice.
ReplyDeleteYou've inspired me to art-up my home when constructed. I'll use nautical themed frescoes. Any suggestions other than the obvious anchors, sailboats, nautilus shells?
ReplyDeleteThank you, very much!
Dave
with what have you mounted those to the foam board with? I'm thinking of doing one, will probably mount it to a small masonite board as its stiffer & wont break as easy as a foam board.
ReplyDeletethanks
Hello. Thanks for this great idea. Question...why use burlap vs a paper plate? Thanks
ReplyDeleteThe burlap gives you a rustic old world look for display and allows you to hang them on the bulletin board vs having to display them on a table. The kids pour their own fresco so they all look different.
ReplyDeleteHello! I plan to do a craft like this for a library program. Do you think it would be possible to prep the "canvases" before the program, have the instruction time, then bring them out? Or will I have to paint onto the burlap on the spot so they don't dry too quickly? I'm worried about them setting too fast or not fast enough.
ReplyDelete