
It's also one of those skills you need to continually practice.

Now the classic lesson is to do single point perspective, the focal point is dead center, horizon line is straight. The kids give it a try and are excited to see the illusion of distance occur before their very eyes.
Another way you can learn about perspective is to think of your focal point or view point as a square or rectangle rather than a single point.
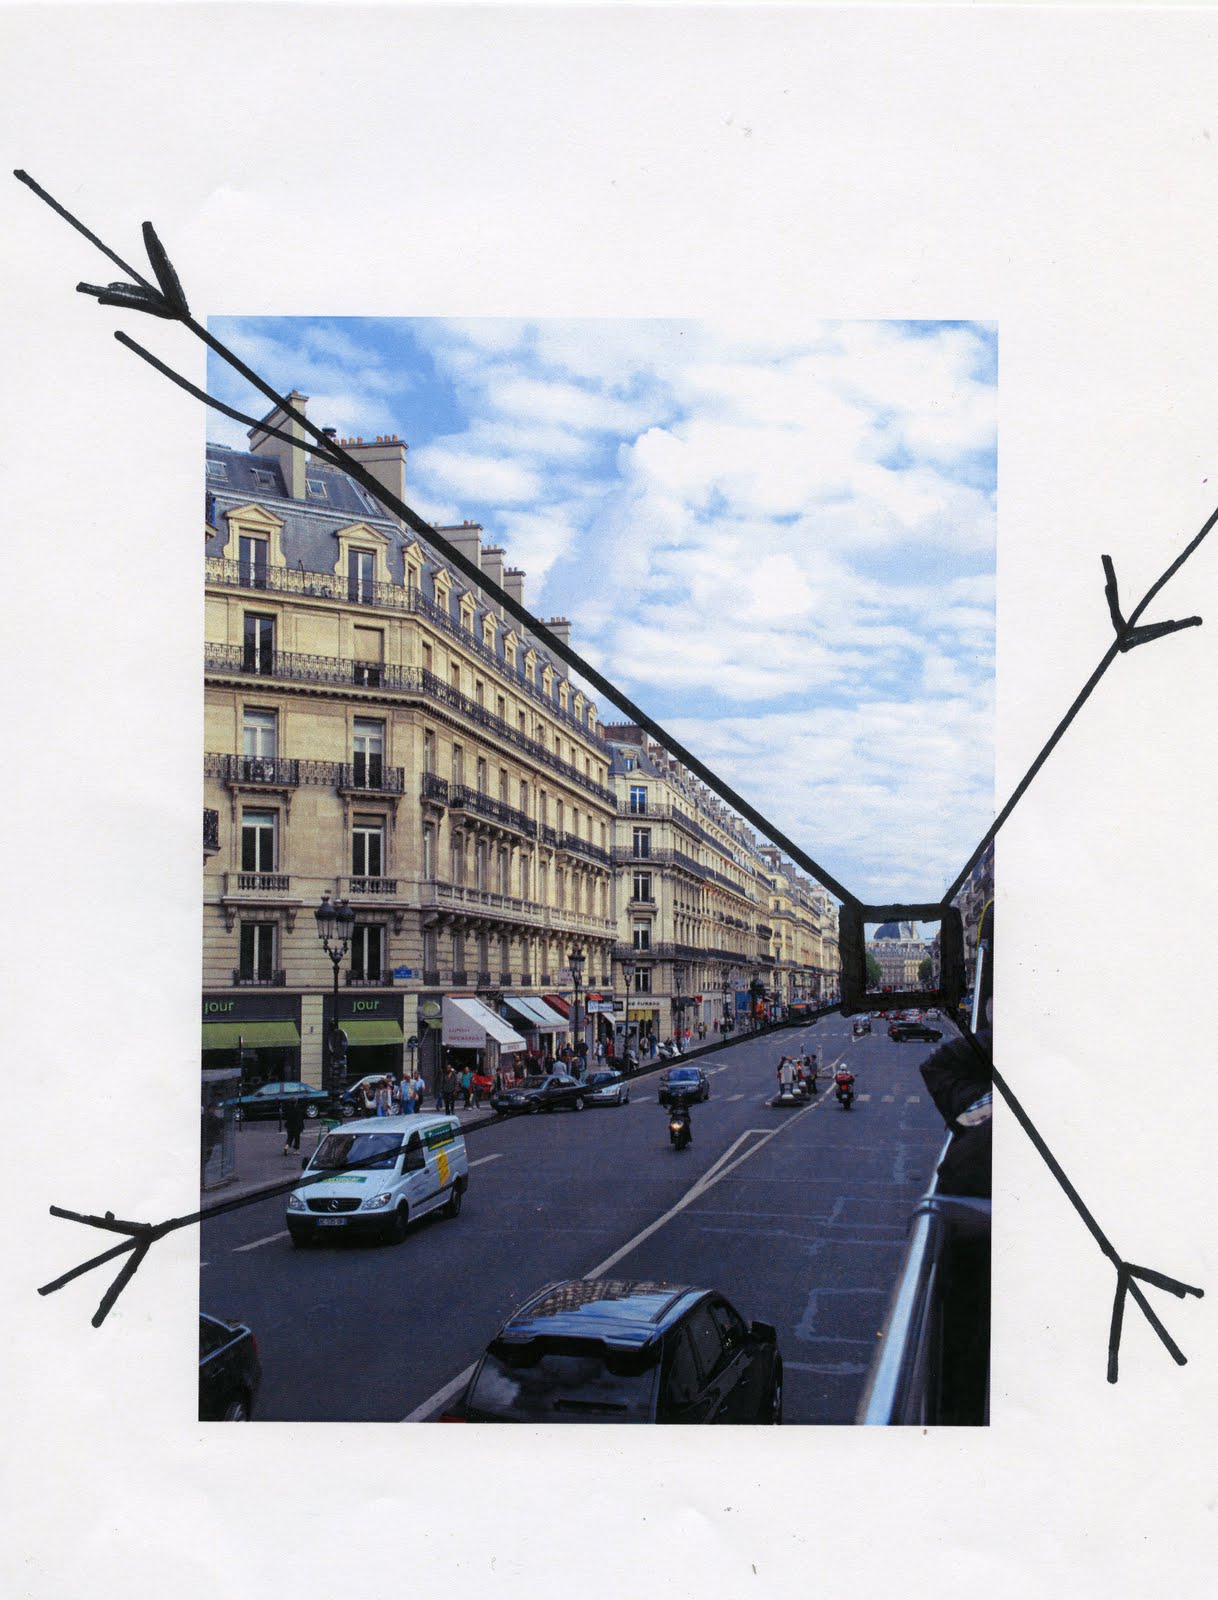
For example here is a picture I took of a street in Paris. It has a lot going for it. It's easy on the eye for the viewer. Our view point is the little square off to the right and our perspective lines/diagonal lines are coming from the corners. Techinically these are orthogonals.

Now the eye loves diagonals especially zig zags. The most popular landscape paintings and photographs will make use of a zig zag...it leads the eye thru the composition.

A good place to start is to use a cut out square or rectangle to represent your view point.

You then trace the sides of that square and make your perspective or diagonals. Here the bottom left line is curved as if we are walking around a corner.

Now you are going to add components to your view box and at times things are going to partially block that view. Here I have put a building coming into that view box.

Now this is a more abstract street scene. Color is put in respecting the values of the real view and some detail is added with charcoal, sharpie, and white pencil crayon.

Let's try another one. Here is a picture my husband took of the old town wall in Lucerne, Switzerland.
It has a great zig zag.(always look for those diagonals and zig zags when taking photos). It also has great light, and we have shadows. The same scene on a cloudy day would be flat and far less dynamic.

Now our view box falls about here. The large tower on the left also draws the eye by it's light color and wonderful shape but your eye continues on and looks down at the grey house in the view box.

To start this composition I take a little square and trace around it lightly.

I continue my drawing out from this square. The house on the right encroaches in on my square a bit, this just adds to the illusion of perspective as this is what you would see in real life.

I decided to do a mixed media project so I start by adding some background with some watercolor wash. You could use disk tempera.

I add some tissue paper texture using the method I described here for the wall.

I also start adding some different papers for different parts. A easy way to do this is to fold the paper to fit and then cut on those folds.

When you have added all the different papers you want you can start adding more paint (watercolor and acrylic) for the details.


Try using the view box instead of a single point the next time you tackle perspective and remember to look for those zig zags.
See you soon.

See you soon.
This is very helpful. Thanks for sharing!
ReplyDeleteKate Eshelman
Big Rapids, MI
that is awesome!!! Great talent!!
ReplyDeleteWhen I was given the responsiblity to teach perspective to 4-5 year olds last year, I had no idea how to even try. I'll be glad to pass this on to others in our Classical Conversations tutorial. Thanks so much!
ReplyDeleteBrandy at Half-a-Hundred Acre Wood
Oh how I love your perspective painting of Lucerne. We don't see enough of your watercolors on this blog! Thank you for the tutorial, Gail. You are so right about not practicing!
ReplyDeleteThis is incredible! I just worked with my son on a science project that included artwork and he chose to use perspective in his drawing. It was tricky. I wish I had read this post first!
ReplyDeletePeace!
Hi there... You've been walloped by the wand of the Art Fairy! I loved this tutorial so much that it made the Weekly Top Twenty at the Art Fairy. Stop by an pick up a button if you get a chance.
ReplyDeleteThis is really helpful Gail. I've always had trouble with the whole perspective thing. I plan to sketch something today keeping your instructions in mind. Will keep you posted.
ReplyDeleteI am so glad I found your excellent blog. Love doing art with my Grand kids and for myself. I really appreciate your teaching style. Very useful way to learn perspective, great for kids and adults! I have found many wonderful projects, for which I thank you deeply. Went to Back to School Night for K and 2nd grade last night and, great ideas you have for kids and adults. I repeat myself... trying to say THANK YOU !
ReplyDeleteyour new fan in SF
Jackie
Thank you for this, so great to see the Progress.
ReplyDeletewow.........this is fabulous..I love watching your process and seeing the result:). A lot learnt! Thanks sooo much!
ReplyDeleteThanks so much for taking the time to share this. I have some lovely photos of Italy that I took last year and I didn't know this very basic skill.
ReplyDeleteBeautiful tutorial. Love how you add those dimensions with other materials.
ReplyDeleteBlessings,
Janis www.janiscox.com
I wish many of your postings were in a book form
ReplyDeleteThis was incredibly helpful. Thank you. I will be using this with my students.
ReplyDeleteThank you for keeping these lessons online! I am an adult with a traumatic brain and. I have problems following multiple steps, or ambiguous instructions. Your lessons are so very helpful for me.
ReplyDeleteThank you for all you do!
Brenda